 how-to
Avoiding Paint Mess During Home Renovation
Table of Contents
- How to Contain Paint Mess and Seal Off Your Work Area
- Protecting Hardwood Floors During Renovation
- Essential Painting Tools for Beginners to Prevent Splatter
- How to Remove Paint Splatters from Carpet
- Managing Dust and Debris During Sanding
- Post-Renovation Deep Cleaning and Disposal
- Frequently Asked Questions
Last Updated: September 14, 2026
How to Contain Paint Mess and Seal Off Your Work Area
Avoiding paint mess during home renovation starts with containment, not cleanup. Paint mess is the overspray, splatter, drips, and fine dust that escape your work zone and land on floors, furniture, and finishes you never intended to touch. Containment is the first step of every job, because a sealed work area is cheaper to build than a stained floor is to fix.
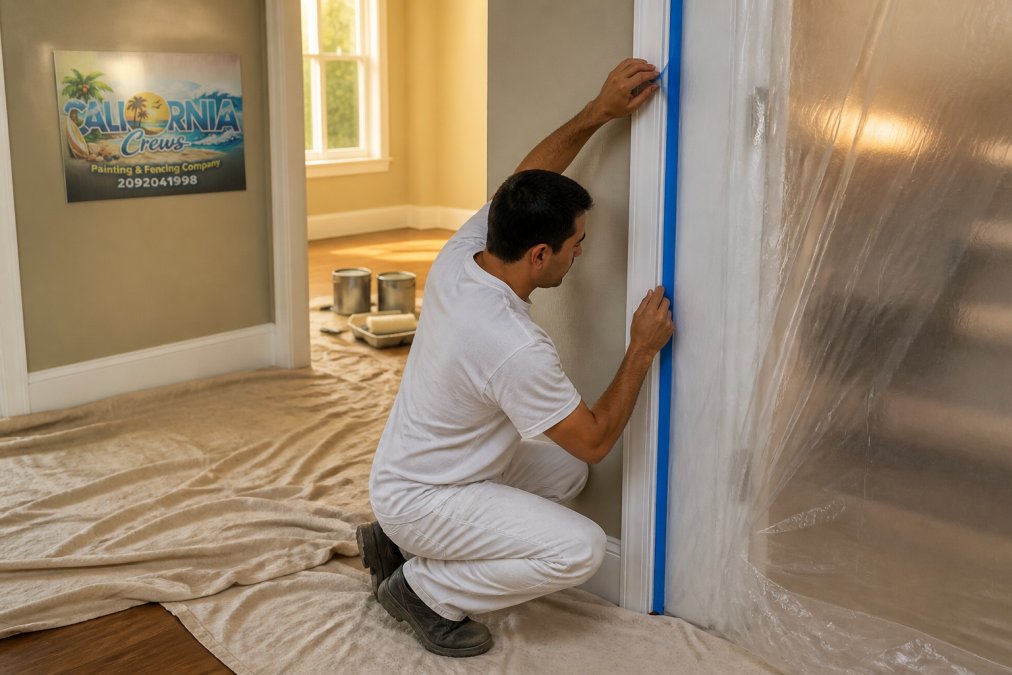
The setup takes about 30 minutes and follows four steps:
- Seal doorways with plastic sheeting taped edge to edge, leaving one entry flap.
- Cover the floor with canvas drop cloths, then a plastic layer beneath them if you are spraying.
- Mask trim and outlets with painter's tape, pressing the edge down firmly.
- Block HVAC vents in the room with plastic and tape to keep dust out of the system.
Protecting Hardwood Floors During Renovation
Protecting hardwood floors during renovation means layering materials, not relying on a single drop cloth. Canvas absorbs drips and stays put underfoot. Plastic stops solvent and primer from wicking through to the finish. Used together, they handle both paint splatter and the grit you track in and out.
A common mistake is taping plastic directly to a finished floor with aggressive tape. The adhesive can pull up the finish when you remove it. Tape the plastic to the baseboard or to the canvas layer instead, and use a low-tack painter's tape anywhere near a sealed surface.
For high-traffic pathways between your work area and the door, lay a second runner of canvas or a washable cover. That path takes more foot traffic than the room itself, and it is where most accidental drips end up.
Essential Painting Tools for Beginners to Prevent Splatter
The right tools cut splatter before it happens, but the tool that prevents one kind of mess can create another. Rollers fling droplets, sprayers produce overspray that drifts like fog, and brushes drip along the ferrule. Match the tool to the mess you are willing to manage, then buy the accessory that controls it.
Rollers. A cheap roller with a thin cover loads unevenly and slings paint off the edges. Match nap to surface: a 3/8-inch nap for smooth drywall and trim, a 1/2-inch nap for lightly textured walls, and a 3/4-inch nap for brick, stucco, or rough wood. A roller screen or bucket grid lets you roll off excess until the cover stops dripping before it touches the wall. Overloading a roller is the single most common cause of ceiling and wall splatter.
Brushes. A 2- to 2.5-inch angled sash brush gives you control along trim and cut-in lines. Synthetic bristles suit water-based paint; natural bristles hold oil-based paint better but swell in water. Load only the bottom third of the bristles and tap the ferrule against the can rim rather than wiping it, which pushes paint up into the heel and causes drips down the handle.
Paint sprayers. Sprayers are the fastest way to coat a large surface and the fastest way to coat everything you did not intend to. Airless sprayers atomize paint into a fine mist that drifts 10 to 20 feet and settles on floors, furniture, and HVAC returns. HVLP (high-volume, low-pressure) units produce less overspray and suit trim and cabinets. If you spray, mask every surface in the room, not just the floor, and shut off the HVAC or block the returns before you pull the trigger. Spray outside whenever the weather allows.
Containment accessories. A paint bucket with a lid keeps the can sealed between passes and stops the ring of dried paint that flakes into fresh coats. A 5-gallon bucket with a roller grid doubles as a carrying station. A HEPA filter vacuum captures drywall dust and sanding debris at the source instead of pushing it into the air.
Safety gear. A respirator rated for organic vapors for solvent-based products, N95 or better for sanding dust, and ventilation for every room regardless of product. Solvent-based paints and finishes release VOCs; open a window and run a fan even when the label says low-odor.
How to Remove Paint Splatters from Carpet
Removing paint splatters from carpet depends on whether the paint is water-based or oil-based, and on how fast you act. Fresh latex paint lifts with warm water and a little dish soap. Dried latex needs a solvent, and oil-based paint needs a different approach entirely.
Work in this order:
- Blot, don't rub. Rubbing pushes paint deeper into the fibers.
- Test a hidden spot with your chosen solvent before touching the visible stain.
- For latex: dab warm soapy water, then rinse and blot dry.
- For oil-based: use a small amount of mineral spirits on a clean cloth, working from the outside in.
- Rinse thoroughly and dry with a clean towel to lift residual solvent.
The thing nobody tells you about carpet stains is that the solvent matters more than the scrubbing. Match the solvent to the paint type, and most splatters lift in a few passes.
Managing Dust and Debris During Sanding
Managing dust during sanding is a containment problem, not a sweeping problem. Drywall dust and sanding debris travel on air currents and settle on every surface in the house if you let them. The fix is to capture dust at the source.
Attach a HEPA filter vacuum to your sander whenever the tool allows it. Seal the room with plastic sheeting before you start, and keep the HVAC off or the vents blocked. Sand with the lights angled across the surface so you can see the dust as you create it, and wipe down walls and ledges with a damp cloth as you go rather than waiting until the end.
Post-Renovation Deep Cleaning and Disposal
Post-renovation cleanup is where most DIY projects stall. Paint buckets, solvent-soaked rags, dried splatter, and fine dust all need a plan before you declare the job done. Most guides stop at "wipe the walls and vacuum the floor." The dust that actually causes problems is the dust you cannot see: the fine construction dust that settles into HVAC returns, upholstery, curtains, and the gaps around baseboards. This section covers the full protocol, plus the disposal and apartment constraints most guides skip.
Step 1: Ventilate and protect yourself. Open windows and run fans before you start. Wear an N95 or better respirator while you disturb settled dust, and gloves when handling solvents. If the home was built before 1978, assume lead-based paint until tested, and follow EPA lead-safe renovation requirements for containment and cleanup.
Step 2: Clean top-down, dry before wet. Work ceiling, then walls, then floors, so dust does not re-settle on surfaces you already wiped. Start with a HEPA vacuum on ceilings, corners, and light fixtures. Follow with a damp microfiber cloth on walls and ledges. Change the cloth or rinse it often; a dirty cloth just moves dust around.
Step 3: HVAC and upholstery. This is the step most guides miss. Fine drywall and sanding dust recirculates through the HVAC system for weeks after the job. Replace the HVAC filter at the end of the project, and if the system ran during sanding, have the ducts cleaned by a qualified contractor. For upholstery, curtains, and rugs, vacuum both sides with a HEPA vacuum, then follow with a fabric-safe upholstery attachment. Wash removable curtains and slipcovers per their care labels. For rugs, a professional cleaning is worth it if the dust is heavy.
Step 4: Floors and baseboards. Vacuum, then damp-mop. Do not sweep drywall dust with a broom; it just lifts the dust back into the air. Pay attention to the gap where baseboard meets floor, a common dust trap.
Step 5: Dispose of waste responsibly. This is the other gap most guides skip.
- Solvent-soaked rags. Linseed oil, oil-based paint, and solvent rags can self-ignite. Spread them flat to dry outdoors, away from the house, then dispose of them per your local household hazardous waste rules. Never ball them up in a trash can.
- Leftover paint. Latex paint can often be dried out (add cat litter or a commercial hardener) and disposed of with regular trash once solid, but check your local rules first. Oil-based paint, solvents, and thinners are household hazardous waste and must go to a designated collection site. Many areas also run paint recycling or donation programs.
- Paint-soaked materials. Drop cloths, cardboard, and plastic sheeting with dried latex paint can usually go in regular trash once dry. Materials soaked with oil-based paint or solvent should go to hazardous waste.
- Check the rules. EPA guidance on household hazardous waste explains how to find your local collection options.
Apartment and rental constraints. The workflow changes when you cannot block a shared hallway, run a sander late, or leave a window open overnight. Schedule messy work for daytime hours, seal your own doorway from the inside, and use a HEPA vacuum instead of sweeping so dust does not drift into shared spaces. Coordinate with neighbors before you start, and check your lease or HOA rules before any renovation work. If you cannot ventilate adequately, choose low-VOC or zero-VOC products and work in short sessions.
If you are weighing a professional job against doing it yourself, ENERGY STAR guidance on hiring contractors offers a useful framework for vetting anyone you bring into your home.
Frequently Asked Questions
What is the best way to protect floors during a painting project?
Use a layered approach: start with plastic sheeting or a tarp as a base, then add canvas drop cloths on top. For hardwood floors, choose a breathable drop cloth to prevent moisture buildup. Secure edges with painter's tape, and overlap seams by at least 6 inches. This setup catches paint splatters and dust while keeping floors safe from spills.
How do I keep paint dust from spreading to other rooms?
Seal off the work area with plastic sheeting and painter's tape at doorways. Use a HEPA filter vacuum for cleanup, and place a box fan with a furnace filter near the exit to trap airborne particles. For sanding, attach a dust collection system to your sander. These steps keep dust from migrating into living spaces.
What are the essential supplies for a mess-free paint job?
You'll need painter's tape, plastic sheeting, canvas drop cloths, a roller tray, paint bucket, and a HEPA vacuum. For beginners, a paint edger and a small brush for tight spots help reduce splatter. Also keep a damp rag and solvent like mineral spirits on hand for quick cleanup. These tools cover containment, application, and cleanup.
How do professionals manage paint cleanup during a renovation?
Professionals use a zone system: they set up a dedicated paint pouring station, cover all surfaces, and clean as they go. They vacuum with HEPA filters, dispose of paint waste according to local regulations, and perform a final deep clean. This method prevents mess from spreading and ensures a spotless finish.