 blog
blog
Professional vs DIY Fence Installation: Cost, Time & Skills
Table of Contents
- Professional Fence Installation vs DIY: The Core Differences
- Cost Comparison: Labor vs. Materials for Fence Replacement Cost Breakdown 2026
- How Long Does It Take to Install a Fence
- DIY Fence Installation Tools List and Equipment Needs
- Permits, Zoning, and Legal Requirements
- Structural Integrity, Durability, and Long-Term Maintenance
- Making Your Decision: Professional Installation or DIY
- Frequently Asked Questions
Last Updated: September 3, 2026
Professional Fence Installation vs DIY: The Core Differences
When deciding between hiring a professional or doing it yourself, the choice involves trade-offs across labor, materials, time, skill level, permits, and long-term durability. Professional fence installation delivers peace of mind and structural integrity, while DIY saves money upfront but may cost more in repairs later.
This guide breaks down the practical realities of professional fence installation vs DIY so you can decide with confidence. We'll cover cost differences, time investment, skill requirements, legal obligations, and long-term maintenance.
Cost Comparison: Labor vs. Materials for Fence Replacement Cost Breakdown 2026
The cost equation for fence installation splits into two parts: materials and labor.
DIY Fence Installation requires you to purchase all materials yourself. Material costs depend on fence type, wood, vinyl, composite, and metal each carry different price points. The advantage is controlling material selection and shopping for deals. However, inexperienced installers often overcut boards, miscalculate post spacing, or damage materials during installation. Material waste typically runs 10-15% higher on DIY projects compared to professional work (peer-reviewed research).
Professional Fence Installation includes both materials and labor bundled into a single quote. Professional contractors purchase materials at contractor rates, which are lower than retail, and minimize waste through experience. You pay for their labor expertise, equipment, insurance, and overhead. However, higher-quality materials installed professionally often last 15-20 years versus 5-7 years for budget materials chosen for DIY projects (fpl.fs.usda.gov).
The cost-benefit analysis shifts based on fence length. A small 50-foot project might seem like a good DIY candidate, while a 200-foot project makes professional installation more attractive because the per-foot labor cost spreads across more material.
How Long Does It Take to Install a Fence
Timeline expectations differ dramatically between professional and DIY approaches.
Professional fence installation typically completes in 3-7 days depending on fence length and complexity. A standard 100-linear-foot fence takes about 3-4 days. Professional crews work in parallel, with one team handling post-hole digging while another prepares materials and a third installs panels. Professional installers also handle permits and inspections, which add 1-2 weeks to the overall timeline if required.
DIY fence installation typically requires 2-4 weekends for a 100-linear-foot fence, assuming you work 8-10 hours per day. Post-hole digging is the bottleneck, taking 6-8 hours alone. Concrete setting requires 24-48 hours before you can install panels. Weather delays pose a real risk, rain prevents concrete from setting properly, and extreme temperatures affect material performance.
DIY Fence Installation Tools List and Equipment Needs
Successful DIY fence installation requires specific tools. Many homeowners underestimate the scope of what's needed.
Essential tools include a post-hole digger or power auger, a level, a tape measure, a circular saw or miter saw, a power drill, a hammer, and safety equipment (gloves, safety glasses, dust mask). A power auger rents for $50-150 per day and makes the project feasible for most homeowners. Without it, you're looking at 8-12 hours of strenuous digging.
A quality level is essential, fence posts must be plumb (perfectly vertical) for the entire structure to align properly. A 2-foot or 4-foot level costs $20-60 and prevents crooked panels that look wrong and fail faster.
Concrete mixing requires a concrete mixer or wheelbarrow, mixing tools, and concrete bags or ready-mix delivery. A typical 4x4 post set 3 feet deep requires 50-60 pounds of concrete per hole. For 25 posts, that's 1,250-1,500 pounds of concrete.
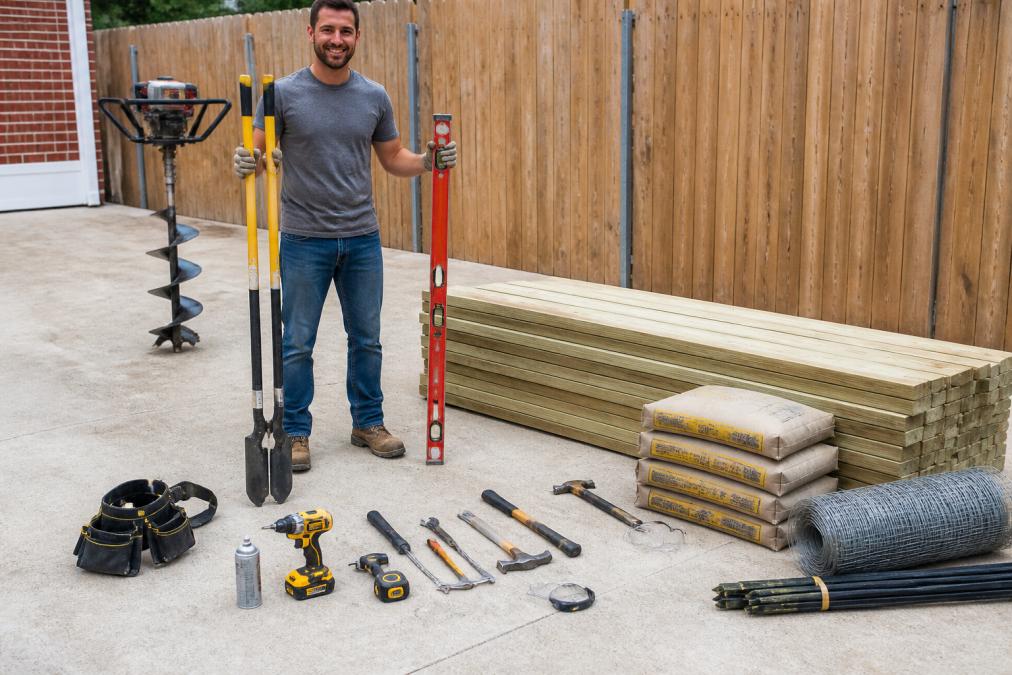
Safety equipment matters more than many DIYers realize. Protective eyewear prevents wood splinters and concrete dust. Work gloves protect against blisters and splinters. A dust mask becomes essential when cutting boards or mixing concrete.
Renting vs. buying tools is a practical decision. If you own a circular saw, drill, and hammer, renting a power auger ($50-150/day) and concrete mixer ($30-50/day) makes sense for a one-time project. Budget $200-400 for tool rental if you don't already own most items.
Permits, Zoning, and Legal Requirements
Fence installation involves legal obligations that many DIYers overlook. Skipping permits creates liability and can force you to remove a completed fence.
Building permits are required in most jurisdictions for fence installation. Permit requirements vary by location, fence height, and setback distance from property lines. A typical permit costs $50-200 and processing takes 1-3 weeks. Some jurisdictions waive permits for fences under 4 feet tall, but you must verify this before starting.
Setback requirements mandate how far a fence must be from your property line. Standard setbacks are 6-12 inches from the property line, but some jurisdictions require the fence entirely on your property. Violating setback rules means the fence must be moved or removed.
Property line location is critical. A professional surveyor can mark the exact property line for $300-800. This cost is worthwhile compared to the cost of moving a fence that's in the wrong location.
Utility lines present serious hazards. Before digging any post holes, contact your local utility locating service (typically called "Call Before You Dig"). This free service marks the location of underground electric, gas, water, and sewer lines. Professional installers always locate utilities; many DIYers skip this step and gamble with their safety and liability.
HOA and neighborhood covenants may restrict fence materials, height, color, or style. Check the covenants before starting if your property is in an HOA community. HOAs can require you to remove non-compliant fences at your expense.
Warranty and liability differ between professional and DIY installation. Professional contractors typically warranty their work for 1-2 years against defects in installation. DIY installation carries no warranty, and you bear the full cost of repair or replacement if the fence fails.
Structural Integrity, Durability, and Long-Term Maintenance
The difference between professional and DIY fence installation becomes most apparent over time. Structural integrity determines how long a fence lasts and how well it withstands weather, settling, and wear.
Post setting is the foundation of fence durability. Posts must be set deep enough to resist frost heave (the upward movement of posts during freeze-thaw cycles). Industry standard is 3 feet deep for posts supporting 6-foot panels (awc.org). Professional installers use concrete footings that extend below the frost line and tamp soil properly before pouring concrete. DIYers often set posts 2-2.5 feet deep to save digging effort, which leads to frost heave and leaning posts within 2-3 years.
Concrete quality affects post longevity. Professional contractors mix concrete to proper water-to-cement ratio and finish the surface with a slight slope to shed water away from the post base. DIYers often mix concrete too wet, which weakens the final product and allows water to pool around posts, accelerating rot.
Panel alignment and spacing impacts both appearance and longevity. Panels must be level and plumb for proper water drainage and structural performance. Professional installers verify alignment with lasers and levels; DIYers often eyeball alignment, which looks wrong and performs poorly.
Material selection influences durability significantly. Pressure-treated wood lasts 15-20 years when installed properly. Cedar and redwood last 10-15 years. Vinyl and composite materials last 20-30 years but cost more upfront. Professional contractors understand material performance and recommend appropriate materials for your climate and budget.
Maintenance requirements differ by material. Wood fences require staining or sealing every 2-3 years to prevent rot and weathering. Vinyl requires occasional cleaning but no sealing. Composite materials require minimal maintenance.
Making Your Decision: Professional Installation or DIY
The choice between professional fence installation and DIY depends on your specific situation.
Choose professional installation if:
You lack experience with tools and construction. You value your time more than money. You want warranty coverage and liability protection. Your fence involves complex factors like slope, utility lines, or HOA requirements. You want long-term durability.
Choose DIY if:
You have construction experience and own most necessary tools. You enjoy hands-on projects and have flexible time availability. Your project is small (under 100 linear feet) and straightforward. You're comfortable learning new skills and researching local requirements.
The middle ground of hiring a professional for some tasks and DIY for others rarely works well. Post setting and concrete work require precision that's hard to correct later. Many homeowners find that professional installation for the foundation and framework, with DIY panel finishing, delivers the best balance of cost and quality.
The fence installation decision ultimately reflects your priorities. Professional installation prioritizes durability, speed, and warranty coverage at higher upfront cost. DIY prioritizes cost savings but demands time, skill, and tolerance for potential mistakes. Evaluate your timeline, budget, experience level, and long-term expectations honestly.
For homeowners in the Modesto area facing complex fence projects, especially those involving permits, utility concerns, or structural challenges, California Crews / Painting & Fencing Modesto provides professional fence installation. Get a consultation to understand your specific project's requirements and professional options.
=== FAQ ANSWERS (audit these too, same rules) ===
[1] Q: Is it cheaper to DIY or hire fence installers? A: DIY fence installation typically costs less upfront because you avoid labor charges, but professional installation saves money long-term through proper concrete footings, correct alignment, and durable post setting that prevents early failure. Professional fence installation also eliminates costly mistakes like utility line damage or structural issues that require expensive repairs. The true cost depends on your skill level, available time, and whether you already own the necessary tools.
[2] Q: What permits and building codes apply to fence installation? A: Most jurisdictions require building permits for fence installation, especially if your fence exceeds 4 feet in height or crosses property lines. Local zoning regulations specify setback distances from property lines (typically 6 inches to 3 feet), height limits, and material restrictions. Many HOAs impose additional covenant restrictions on fence style, color, and placement. Professional installers handle permit navigation and ensure compliance; DIY builders must contact their local building department and verify HOA rules before starting work.
[3] Q: How does professional installation impact the longevity of a wood fence? A: Professional installation extends fence lifespan by 10-15 years through proper concrete footings, precise post alignment, and correct spacing that prevents warping and rot. Professionals set posts 3 feet deep in concrete, which prevents settling and frost heave. DIY installations often skip concrete or use shallow footings, leading to leaning posts and premature failure within 5-7 years. Quality materials combined with professional technique also reduces maintenance frequency and protects your investment in curb appeal.
[4] Q: What tools and equipment do I need for DIY fence installation? A: Essential tools include a post-hole digger (manual or power auger), level, measuring tape, circular saw, hammer, and safety equipment. You'll also need concrete mix, fence panels or boards, posts, screws or nails, and gate hardware if applicable. Many homeowners rent power augers and concrete mixers rather than purchase them. Proper tool selection affects precision and project timeline significantly, inadequate tools turn a weekend project into weeks of labor and often result in poor alignment and structural issues.
Frequently Asked Questions
Is it cheaper to DIY or hire fence installers?
DIY fence installation typically costs less upfront because you avoid labor charges, but professional installation saves money long-term through proper concrete footings, correct alignment, and durable post setting that prevents early failure. Professional fence installation also eliminates costly mistakes like utility line damage or structural issues that require expensive repairs. The true cost depends on your skill level, available time, and whether you already own the necessary tools.
What permits and building codes apply to fence installation?
Most jurisdictions require building permits for fence installation, especially if your fence exceeds 4 feet in height or crosses property lines. Local zoning regulations specify setback distances from property lines (typically 6 inches to 3 feet), height limits, and material restrictions. Many HOAs impose additional covenant restrictions on fence style, color, and placement. Professional installers handle permit navigation and ensure compliance; DIY builders must contact their local building department and verify HOA rules before starting work.
How does professional installation impact the longevity of a wood fence?
Professional installation extends fence lifespan by 10-15 years through proper concrete footings, precise post alignment, and correct spacing that prevents warping and rot. Professionals set posts 3 feet deep in concrete, which prevents settling and frost heave. DIY installations often skip concrete or use shallow footings, leading to leaning posts and premature failure within 5-7 years. Quality materials combined with professional technique also reduces maintenance frequency and protects your investment in curb appeal.
What tools and equipment do I need for DIY fence installation?
Essential tools include a post-hole digger (manual or power auger), level, measuring tape, circular saw, hammer, and safety equipment. You'll also need concrete mix, fence panels or boards, posts, screws or nails, and gate hardware if applicable. Many homeowners rent power augers and concrete mixers rather than purchase them. Proper tool selection affects precision and project timeline significantly, inadequate tools turn a weekend project into weeks of labor and often result in poor alignment and structural issues.
This article was written using GrandRanker
Frequently Asked Questions
Is it cheaper to DIY or hire fence installers?
DIY fence installation typically costs less upfront because you avoid labor charges, but professional installation saves money long-term through proper concrete footings, correct alignment, and durable post setting that prevents early failure. Professional fence installation also eliminates costly mistakes like utility line damage or structural issues that require expensive repairs. The true cost depends on your skill level, available time, and whether you already own the necessary tools.
What permits and building codes apply to fence installation?
Most jurisdictions require building permits for fence installation, especially if your fence exceeds 4 feet in height or crosses property lines. Local zoning regulations specify setback distances from property lines (typically 6 inches to 3 feet), height limits, and material restrictions. Many HOAs impose additional covenant restrictions on fence style, color, and placement. Professional installers handle permit navigation and ensure compliance; DIY builders must contact their local building department and verify HOA rules before starting work.
How does professional installation impact the longevity of a wood fence?
Professional installation extends fence lifespan by 10-15 years through proper concrete footings, precise post alignment, and correct spacing that prevents warping and rot. Professionals set posts 3 feet deep in concrete, which prevents settling and frost heave. DIY installations often skip concrete or use shallow footings, leading to leaning posts and premature failure within 5-7 years. Quality materials combined with professional technique also reduces maintenance frequency and protects your investment in curb appeal.
What tools and equipment do I need for DIY fence installation?
Essential tools include a post-hole digger (manual or power auger), level, measuring tape, circular saw, hammer, and safety equipment. You'll also need concrete mix, fence panels or boards, posts, screws or nails, and gate hardware if applicable. Many homeowners rent power augers and concrete mixers rather than purchase them. Proper tool selection affects precision and project timeline significantly—inadequate tools turn a weekend project into weeks of labor and often result in poor alignment and structural issues.