 how-to
Hiring Professional Painters Without the Mess
Table of Contents
- Why Painters Leave a Mess (and How to Prevent It)
- Hiring Professional Painters: What to Verify Before You Sign
- The Best Questions to Ask Painting Contractors
- How to Prepare Home for Interior Painting: A Room-by-Room Checklist
- What to Look For in a Painting Contract: Protection Clauses
- The Post-Project Inspection: A Walkthrough Checklist
- Handling Sloppy Work, Touch-Ups, and Final Payment
- Conclusion: A Clean Finish Starts With the Agreement
- Frequently Asked Questions
Last Updated: September 9, 2026
The fear is almost universal among homeowners: the crew leaves, and you’re left with paint drips on the hardwood, a fine layer of dust over every surface, and touch-up spots you didn’t ask for. Hiring professional painters without the mess isn’t about luck. It comes down to preparation, clear contracts, and knowing exactly what to inspect before the crew packs up. The cleanest jobs always share one trait: the homeowner knew what to ask for before a single can was opened.
Below, we’ll walk through what to verify before signing, the questions that separate pros from amateurs, and a room-by-room preparation checklist. You’ll also get a post-project inspection framework that catches sloppy work while the crew is still on site, not after final payment has cleared.
Why Painters Leave a Mess (and How to Prevent It)
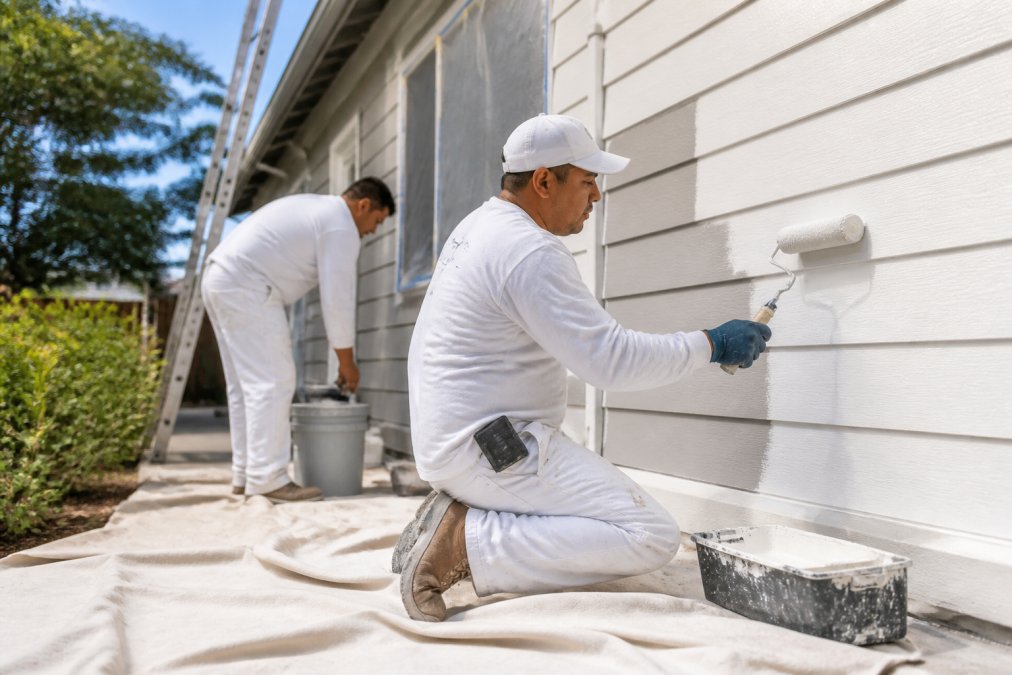
Most messes aren’t accidents. They’re the predictable result of missing protection steps and vague contracts. When a contractor skips floor protection to save time, or relies on a single thin drop cloth, paint splatters and drips become your problem.
Prevention starts with the agreement. A written contract that names specific protection materials and cleanup duties changes the outcome. The painting contractor knows you’ll inspect for those items, so they plan for them.
Common failure points include uncovered floors, unmasked trim, and furniture left unprotected. Each has a simple fix: require drop cloths on every floor surface, painter’s tape on all trim and edges, and plastic sheeting over furnishings. These aren’t extras. They’re professional standards.
Hiring Professional Painters: What to Verify Before You Sign
Hiring professional painters starts with verifying credentials, not comparing quotes. Three documents matter: contractor licensing, bonding, and insurance. A licensed contractor has met state requirements for the trade; bonding protects you if the job is abandoned or left incomplete; insurance covers damage to your home and injuries to workers.
Ask for proof of each and confirm the policy is current. Many states run license lookup tools online where you can verify the number yourself. This takes five minutes and removes most bad actors from consideration.
Residential painting also benefits from checking references. Ask for recent interior jobs, not just exterior ones, since the protection requirements differ. A quick call to a past client about cleanup tells you more than any portfolio photo.
State contractor licensing board resources
The Best Questions to Ask Painting Contractors
The right questions to ask painting contractors force specifics about process, not just price. Skip “Are you careful?” and ask questions with measurable answers.
Start with protection: “What materials do you use to protect floors and furniture?” A detailed answer naming drop cloths, plastic sheeting, and tape indicates a real system. A vague answer means you’ll be cleaning up after them.
Ask about the timeline and crew size. “How many days will this take, and how many painters will be on site?” This sets expectations for how long your home is disrupted and how much supervision the job needs.
Then ask about the walkthrough. “When do we inspect the work together before final payment?” A contractor who welcomes a joint inspection is confident in their quality control. One who hesitates is telling you something.
Finish with materials. “What brand and grade of paint will you use?” Quality materials matter for durability, and the answer should be specific, not “whatever the supplier has.”
How to Prepare Home for Interior Painting: A Room-by-Room Checklist
Learning how to prepare home for interior painting reduces mess and speeds up the job. Preparation is a partnership: the contractor handles surface prep, but you control the room’s contents.
Living areas and bedrooms:
- Remove wall art, curtains, and hardware
- Move small furniture to the center and cover with plastic sheeting
- Clear shelves of items that could vibrate or fall during work
- Vacuum floors so dust doesn’t get tracked through wet paint
Kitchens and bathrooms:
- Clear countertops and cover them with drop cloths
- Remove outlet and switch plates yourself if you prefer to keep them
- Tape around fixtures the painter might miss
High-traffic zones and stairs:
- Plan an alternative path through the home so wet areas aren’t walked on
- Communicate the schedule with your contractor so you know which rooms are off-limits each day
What to Look For in a Painting Contract: Protection Clauses
What to look for in a painting contract comes down to three clauses: scope, protection, and cleanup. The scope names every surface to be painted, the paint brand and color, and the number of coats. Vague scope language leads to arguments about whether the ceiling was included. The protection clause, however, is where you can turn the 'no mess' promise from a hope into a contractual obligation.
The protection clause should name specific materials, not just the intent. A clause that says 'protect floors' is weak. A clause that says 'use canvas drop cloths on all carpeted areas and 2-mil plastic sheeting on all hardwood floors' is enforceable. Here is what to look for and why it matters:
Drop Cloths: Canvas vs. Plastic
- Canvas Drop Cloths: These are the professional standard for most interior work. They are heavy, absorb spills, and stay in place on floors and furniture. They are also reusable, which is a sign of a professional operation. If you see a contractor using only canvas, it's a good sign.
- Plastic Sheeting (Polyethylene): This is best for covering large furniture, doorways, and for creating dust barriers. It is not ideal for floors because paint can pool on it and be tracked. If a contractor uses plastic on your hardwood floors, ask them to switch to canvas or a specialized paper product.
- Red Rosin Paper: Often used to protect hardwood floors. It is a heavy, slip-resistant paper that provides a good barrier against drips and scuffs.
Masking Tape: Not All Tape is Created Equal
- A professional will use painter's tape (like Scotch-Blue or FrogTape) for crisp edges on trim and baseboards. The key is the tape's 'edge-lock' technology, which prevents paint from bleeding underneath.
- If you see a contractor using standard tan masking tape, it's a red flag. It often leaves adhesive residue and doesn't create a clean line.
- The contract should specify that all trim, baseboards, and window frames will be masked with a high-quality painter's tape.
Writing the 'No-Mess' Guarantee Into the Contract
- Add a specific line item that states: 'Contractor will use canvas drop cloths on all floors and plastic sheeting over all furniture not moved. Contractor will use painter's tape on all trim and edges. Contractor will perform a final clean-up, including vacuuming and wiping down surfaces, to remove all paint debris and dust.'
- Include a clause about daily clean-up. This is crucial for a multi-day project. It should state that the crew will remove all debris, drop cloths, and materials at the end of each workday, leaving the site 'broom clean.' This prevents you from living in a construction zone for a week.
Guidance on home improvement contracts
Contractual checklist for a mess-free job:
- Scope of work with specific surfaces and paint brands
- Protection materials named explicitly (e.g., 'canvas drop cloths on all floors')
- Daily and final cleanup duties, including the phrase 'broom clean'
- Timeline with start and completion dates
- Walkthrough and touch-up process before final payment
- A clause stating that any damage to floors, furniture, or landscaping due to contractor negligence will be repaired or replaced at the contractor's expense.
The Post-Project Inspection: A Walkthrough Checklist
The final walkthrough is your last chance to catch issues while the crew is still on site. Schedule it before you hand over the final payment, and inspect in natural daylight. Artificial light hides the very flaws you’re looking for. To make this process foolproof, use a structured checklist that covers every surface, edge, and fixture. This is the moment where the 'no mess' promise is truly kept or broken.
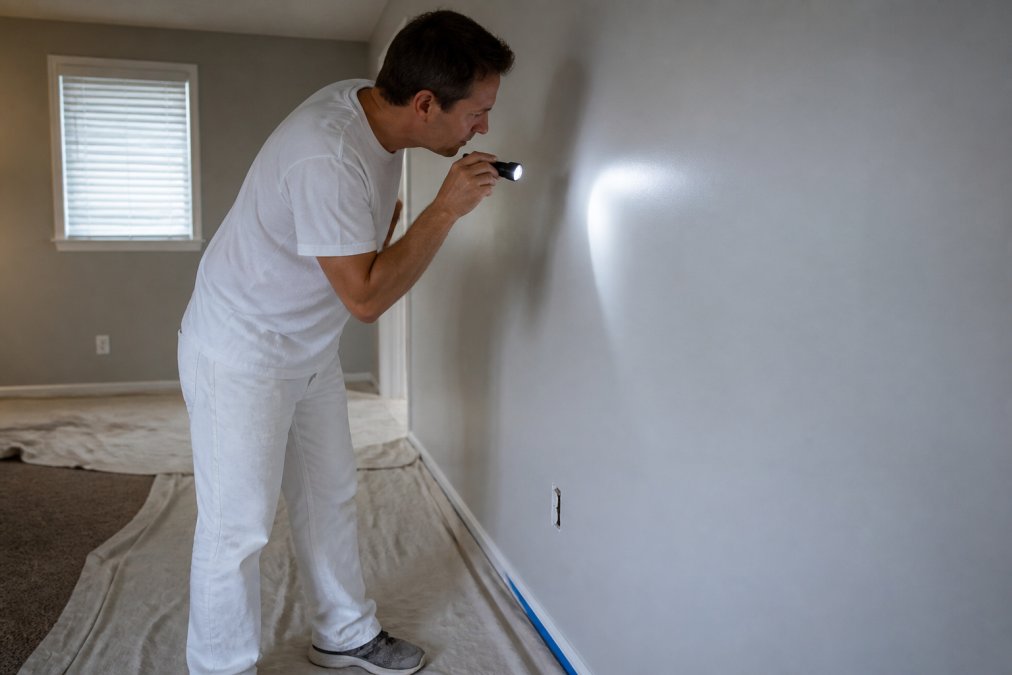
Work through the room systematically, and don't rush. A thorough inspection of a single room takes 15-20 minutes. Here is the exact sequence to follow:
1. Walls and Ceilings (Angle and Light Check)
- Use a bright, focused flashlight (a small LED work light is ideal) held at a low, raking angle against the wall. This reveals roller marks, thin spots, and texture inconsistencies that flat, overhead light hides.
- Check for 'holidays' (missed spots) by looking along the wall from a sharp angle.
- Run your hand (with a clean, dry cotton glove) over the entire surface to feel for drips, rough patches, or embedded debris from sanding.
2. Edges and Transitions (The Detail Check)
- Inspect where the wall meets the ceiling, trim, and baseboards. Lines should be crisp and straight, with no paint bleeding onto the wood or adjacent surface.
- Check corners (inside and outside) for clean, sharp lines. Outside corners are a common place for paint to build up or chip.
- Look closely at window and door frames. Paint should not be built up so thick that it impedes the movement of the sash or the door.
3. Floors and Fixtures (The Mess Check)
- This is the core of the 'no mess' promise. Inspect the floor, baseboards, and any hardware (outlet covers, switch plates, hinges) for paint splatters, drips, or overspray.
- Use a damp, white cloth to wipe a small, inconspicuous area of the floor and baseboard to check for a fine, dusty residue that indicates inadequate protection or cleanup.
- Verify that all outlet and switch plates are reinstalled and not painted over. Check that any light fixtures or ceiling fans are free of paint specks.
4. Functionality Check
- Open and close every window and door in the painted area. They should move freely without sticking or scraping against fresh paint.
- If you had furniture moved, verify it's returned to its original location and check for any damage that occurred during the move.
5. The Final Walkthrough with the Crew
- Do not do this alone. Walk the space with the project manager or lead painter. Point out each issue you find, and have them acknowledge it in writing or on the spot.
- For any touch-ups required, agree on a specific date for them to be completed. Do not accept 'we'll come back next week' without a firm date.
Download the Post-Project Inspection Checklist
A small flashlight held at a low angle reveals drips and uneven texture that normal light hides. Walk the entire room, not just eye level. Paint issues near the ceiling and baseboards are easy to miss. This checklist ensures you cover every square inch, turning a potentially stressful negotiation into a clear, objective process.
Handling Sloppy Work, Touch-Ups, and Final Payment
Sloppy work needs to be addressed before final payment, not after. If the inspection reveals paint drips, uneven coverage, or splatters, document each issue with photos and point them out during the walkthrough. Most contractors will correct legitimate defects to protect their reputation.
Touch-ups are a normal part of any interior painting project. The question is who does them and when. Agree in advance that the same crew handles touch-ups with the same paint batch, since color matching across batches can be imperfect.
Hold a portion of the payment until the walkthrough is complete. This is standard practice and gives you use if corrections are needed. Release the balance only when you’re satisfied with the work.
Conclusion: A Clean Finish Starts With the Agreement
Hiring professional painters without the mess isn’t about finding a contractor who never drips paint. It’s about finding one who plans for drips, protects your home accordingly, and stands behind the work with a written contract and a fair walkthrough process. The preparation you do before the crew arrives determines the cleanup you won’t have to do after they leave.
We build protection and cleanup into every interior and exterior project from the start. Our process covers surface preparation, careful masking, and a joint walkthrough before we consider a job complete. Get started with California Crews and see what a clean, professional finish looks like.
Frequently Asked Questions
How do I ensure my house stays clean during a painting project?
Protection starts before the first drop of paint. Confirm the contractor covers floors with canvas drop cloths and uses masking tape on trim, windows, and fixtures. Ask about furniture moving and dust control measures. A professional contract should state who handles protection and site cleanup. Walk through the work areas each day to catch issues early. A clean job is not luck; it is a standard you set in writing before the project starts.
What questions should I ask a painting contractor before hiring?
Ask about contractor licensing, bonding, and insurance for your state. Request a written project estimate that lists paint brands, finish, and the exact scope of work. Ask how they protect floors and furniture, how they handle paint drips and splatters, and what their daily cleanup routine looks like. Clarify how touch-ups are handled after the walkthrough. Confirm the project timeline and payment schedule in writing before you sign.
What do most painters charge hourly?
Labor rates vary by region, project complexity, and the painter's experience. Hourly rates are less common for whole-home projects, which are usually quoted as a flat project estimate based on square footage and surface preparation. Instead of comparing hourly rates, ask for a detailed estimate that breaks down the scope of work. This gives you a clearer picture of the cost and makes it harder for surprise charges to appear later.
What should I do if the painters leave paint drips or uneven coverage?
Schedule a final walkthrough with the contractor before making the last payment. Point out paint drips, splatters, uneven coverage, and any missed areas. A professional contractor will fix these issues as part of the job. Check your contract for a workmanship guarantee or touch-up clause. Do not make the final payment until the touch-ups are complete and you are satisfied with the clean edges and paint finish.