 how-to
How to Fix Leaning Wood Fence Posts: 2026 Guide
Table of Contents
- Why Wood Fence Posts Lean: Diagnosing the Cause First
- How to Replace a Rotted Fence Post Safely
- Tools and Materials You Need to Fix Leaning Fence Posts
- What to Look for in a Fence Post Repair Kit
- Best Concrete Mix for Fence Posts
- Step-by-Step: Straightening and Resetting a Leaning Post
- When to Call a Professional Instead of DIY
- Conclusion
Last Updated: August 22, 2026
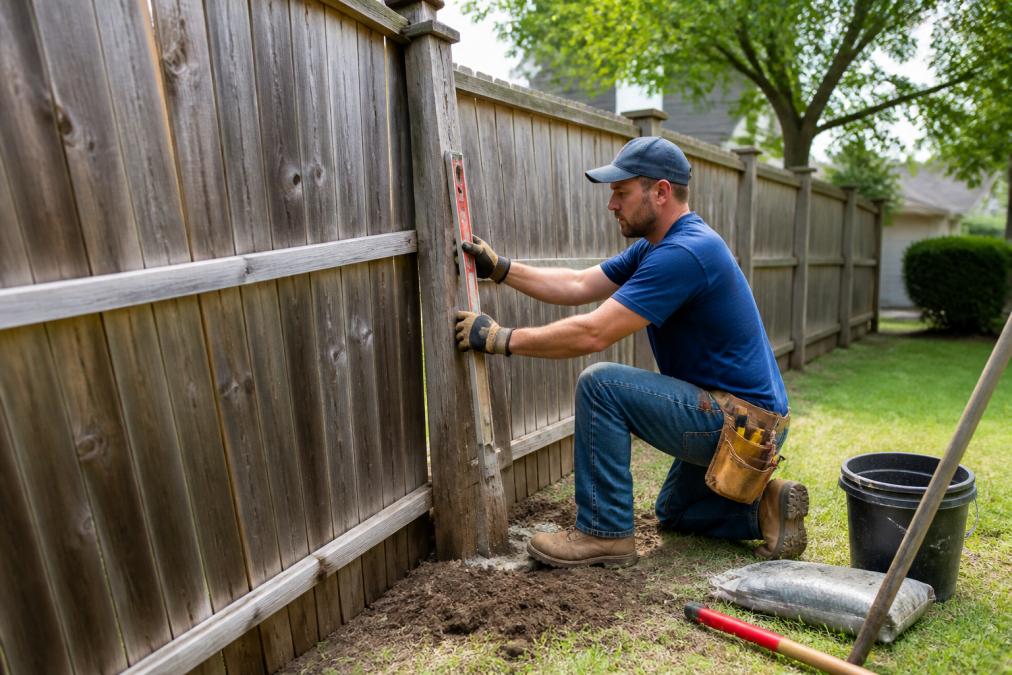
Knowing how to fix leaning wood fence posts before the problem worsens can save you a full fence replacement. A post that starts with a slight tilt can end up pulling rails loose, cracking pickets, and eventually collapsing an entire fence section. Most leaning posts are fixable without professional help, provided you correctly identify the cause first.
Why Wood Fence Posts Lean: Diagnosing the Cause First
A leaning fence post is a symptom, not the problem itself. The two most common culprits are soil movement and wood rot, and they require completely different fixes.
Before you grab a shovel, push the post firmly with both hands. If it rocks easily and the wood feels soft or crumbles at the soil line, you are dealing with rot. If the post feels structurally solid but has simply shifted position, soil movement is the more likely cause.
Soil Composition and Frost Heave
Frost heave is the upward movement of soil caused by water expanding as it freezes underground. It is especially destructive to fence posts set in clay-heavy soil, which retains moisture and expands significantly during freeze-thaw cycles. Posts set in sandy or well-draining soil are far less vulnerable.
If your fence runs through an area where the ground stays wet after rain, or where clay content is high, frost heave is almost certainly contributing to the lean. The fix requires resetting the post below the local frost line, which according to USDA frost depth maps for the United States varies considerably by region. Soil compaction also matters; loose, poorly compacted backfill allows posts to shift laterally over time.
Wood Rot, Moisture, and Subsurface Decay
Wood rot at the base is the most common reason fence posts fail. The decay usually starts underground, where moisture, soil bacteria, and oxygen create ideal conditions for fungal growth. By the time you see visible rot at the soil line, the structural integrity below is often already compromised.
Pressure-treated lumber resists rot far better than untreated wood, but it is not immune. According to Wood preservation guidelines from the American Wood Protection Association, posts should be rated for ground contact, typically designated UC4B for most residential fence applications. If the rot has progressed more than halfway through the post's cross-section, straightening alone will not hold, the post needs replacement.
How to Replace a Rotted Fence Post Safely
Replacing a rotted post is more involved than straightening one, but the process is straightforward if you work methodically.
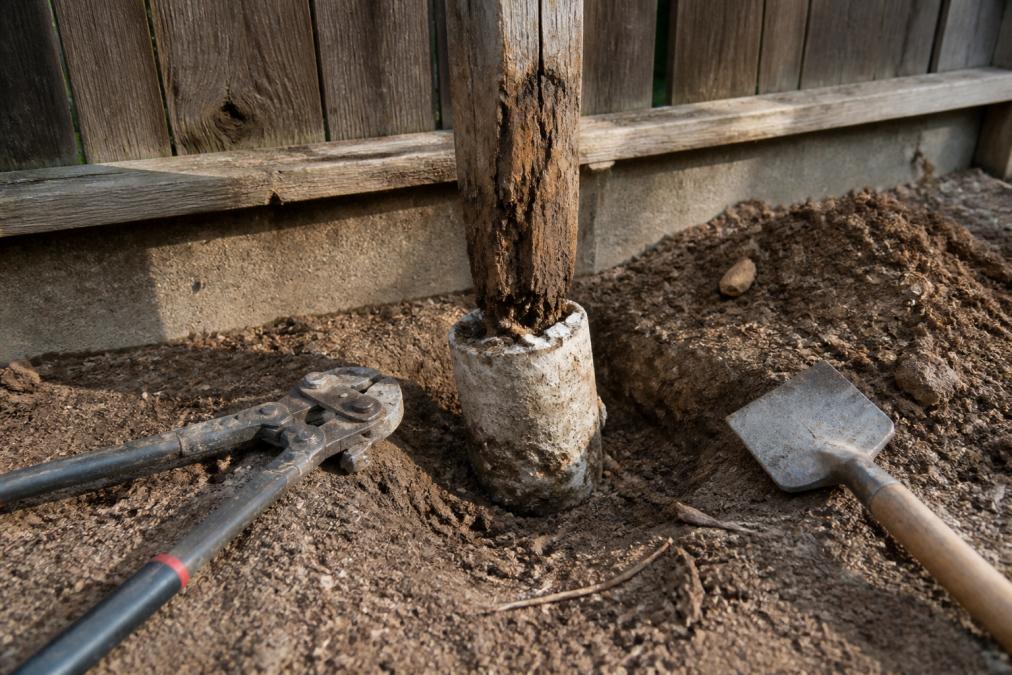
Start by removing any rails and pickets attached to the failing post. Set them aside carefully; most can be reattached to the new post. Then address the old concrete footing.
Checking for Utility Lines Before You Dig
Before any excavation, call 811, the national "Call Before You Dig" service. Under federal law, you are required to notify this service before digging, and utility companies will mark underground lines at no cost to you. The 811 Call Before You Dig program administered by the Common Ground Alliance typically requires 48 to 72 hours notice before excavation begins. Even a small fence post hole can intersect with irrigation lines, low-voltage landscape wiring, or buried cables.
Excavating the Old Concrete Footing
Old concrete footings are the hardest part of a post replacement. Most residential posts are set in a tube of concrete 8 to 12 inches in diameter and 24 to 36 inches deep. You have a few options: dig around the footing and pry it out as a monolithic block, break the footing in place using a breaker bar or rented electric jackhammer, or leave the footing and drill through it if it is still plumb and solid, setting the new post on top with a post anchor bolted into the concrete. Option 3 is often the most practical, especially in tight spaces or where soil is rocky.
Tools and Materials You Need to Fix Leaning Fence Posts
Having the right tools assembled before you start prevents mid-project delays. Here is what a complete fence post repair requires:
| Item | Purpose | Notes |
|---|---|---|
| Post hole digger | Excavating soil around post | Clamshell type for most soils |
| Digging bar / breaker bar | Breaking old concrete footing | Essential for compacted soil |
| Spirit level (4 ft minimum) | Checking plumb alignment | Two-axis bubble level preferred |
| 2x4 lumber (temporary braces) | Holding post plumb while concrete sets | Cut to 4-5 ft lengths |
| Hammer and galvanized screws | Attaching braces and reattaching rails | Galvanized for corrosion resistance |
| Pressure-treated 4x4 post | Replacement post material | UC4B ground-contact rating |
| Concrete mix or expanding foam | Setting the post base | See section below for comparison |
| Gravel (drainage layer) | Post-repair drainage | 3-4 inches at hole bottom |
| Tamping bar | Compacting backfill | Critical for long-term stability |
What to Look for in a Fence Post Repair Kit
A fence post repair kit is a prepackaged solution designed for homeowners who want a faster alternative to full concrete replacement. Look for hot-dipped galvanized or powder-coated steel for corrosion resistance, clearly stated load-bearing capacity, compatibility with 4x4 post dimensions, and concrete anchor options that bolt into existing footings.
Ground Spikes vs. Post Anchors: Long-Term Durability Compared
Ground spikes are driven directly into the soil using a sledgehammer. They are fast to install and require no concrete, but they depend entirely on soil friction for stability and shift over time in loose or wet soil. They are best suited for lightweight decorative fences in stable, well-drained ground.
Post anchors bolt into an existing concrete footing or are set in new concrete. They offer significantly better resistance to lateral load and are the right choice for privacy fences, load-bearing sections, or any post subject to wind pressure. For a long-term repair that holds through multiple seasons, post anchors set in concrete are the more reliable option.
Expanding Foam as an Alternative to Concrete
Expanding foam fence post filler has become a popular alternative to traditional concrete. The foam is mixed and poured into the post hole as a liquid, then expands and hardens around the post base within minutes. The advantages are real: it is lighter than concrete, sets faster, and is slightly flexible, which can reduce cracking from frost heave.
For most residential fence repairs on standard 4x4 posts in stable soil, expanding foam performs adequately. For corner posts, gate posts, or any post carrying significant structural load, traditional concrete remains the more conservative and durable choice.
Best Concrete Mix for Fence Posts
The best concrete mix for fence posts is a fast-setting bagged mix, specifically formulated for post installation. These mixes reach working strength within 20 to 40 minutes and full cure strength within 24 hours.
For post holes in areas with heavy clay soil or poor drainage, add a 3-to-4-inch layer of gravel at the bottom of the hole before setting the post. This drainage layer prevents water from pooling at the post base, which is the primary driver of accelerated wood rot and frost heave.
Step-by-Step: Straightening and Resetting a Leaning Post
How to fix leaning wood fence posts comes down to a clear sequence: stabilize, excavate, reset, brace, fill, and reattach.
Setting Temporary Braces and Getting Plumb
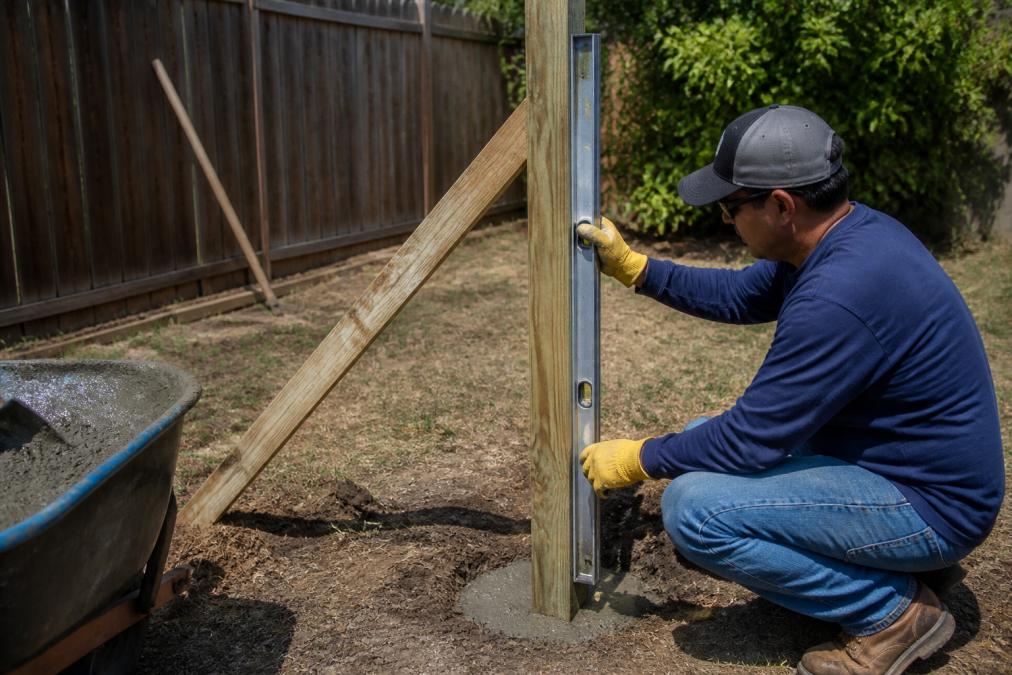
Before adjusting the post position, attach temporary braces to hold it in place once it is plumb. Cut two 2x4 boards to approximately 4 to 5 feet in length. Drive a stake into the ground at a 45-degree angle from the post on two adjacent sides. Attach one end of each brace to the post and the other to the stake using galvanized screws.
With braces loosely attached, push the post to vertical and check with a spirit level on two perpendicular faces. Adjust until both faces read plumb, then tighten the braces to hold the position. Do not release the braces until the concrete or foam has fully cured. Plumb is non-negotiable.
Backfilling, Tamping, and Post-Repair Drainage
Once the concrete or foam has cured, backfill any remaining void around the post with native soil or gravel. Add the fill in 4-inch layers, tamping each layer firmly with a tamping bar before adding the next. This layered compaction prevents the settling that causes posts to shift after repair.
After backfilling, check that the grade around the post slopes away from the wood. If the area is low-lying or prone to standing water, consider extending a short French drain or gravel trench away from the post base to redirect subsurface water.
Reattaching Rails, Pickets, and Fasteners
Once the post is set and backfill is compacted, reattach the horizontal rails. Use galvanized screws or hot-dipped galvanized joist hanger hardware for all connections at the post. Check that rails are level before final fastening. Pre-drill holes to prevent splitting, especially near the ends of boards.
Reattach pickets last, spacing them consistently and checking for plumb on each one. If pickets were damaged during the lean, replace them rather than reattaching cracked boards that will fail again quickly.
When to Call a Professional Instead of DIY
Most single-post repairs are within reach of a motivated homeowner with the right tools. Call a professional when multiple posts are leaning across a fence run, the fence is on a property line, the post is a gate or corner post carrying significant structural load, utility lines were found near the post location, or the fence is part of a pool enclosure.
According to International Building Code guidelines on residential fencing, pool barrier fences are subject to specific height and structural requirements that must be maintained after any repair. A failed repair that does not restore code compliance can create liability exposure for the homeowner.
| Situation | DIY Appropriate? | Reason |
|---|---|---|
| Single post, no rot, stable soil | Yes | Straightforward reset with braces and concrete |
| Single post with rot, no utility lines | Yes with care | Full replacement needed; follow 811 protocol |
| Multiple leaning posts | No | Systemic issue requires professional diagnosis |
| Gate or corner post failure | No | Load-bearing repair requires structural assessment |
| Pool enclosure fence | No | Code compliance and liability concerns |
| Post adjacent to utility lines | No | Safety and legal risk during excavation |
Fence post problems rarely fix themselves, and a post that leans today will pull neighbors out of alignment, crack rails, and eventually bring down a fence section. If the repair is within your skill set, this guide gives you the full process. If the scope is larger than a single post, or if you want the work done right the first time, the California Crews / Painting & Fencing Modesto team offers professional-grade fence repair and installation experience. Contact us for an assessment and get your fence straight, stable, and built to last.
Frequently Asked Questions
Q: How do you fix a leaning fence post without removing it?
A: If the post still has structural integrity and the wood shows no rot, you can straighten it without full removal. Dig out soil on the high side of the lean to relieve pressure, use a clamp and temporary brace to pull the post plumb, then pack the hole with compacted gravel and fast-setting concrete. Expanding foam products designed for fence posts are another option. This approach works best when the original footing is intact and the post is pressure-treated lumber in good condition.
Q: When should you replace a fence post versus repairing it?
A: Replace the post when the wood is soft, spongy, or shows visible rot at or below the soil line, probing with a screwdriver will reveal decay quickly. A post that has lost more than one-third of its cross-section to rot lacks the load-bearing capacity to hold rails and pickets securely. If the concrete footing has heaved, cracked, or pulled free entirely, replacement is also more cost-effective than patching. Repairing makes sense only when the post is structurally sound and the lean comes from soil movement alone.
Q: How do you reinforce a loose fence post in soft soil?
A: Soft or sandy soil compacts poorly and allows posts to shift over time. Dig the hole at least deeper than the frost line for your area, add a gravel drainage layer at the base, and set the post in fast-setting concrete rather than backfilled soil. For ongoing stability, a post anchor driven into undisturbed subsoil alongside the existing footing adds a second point of resistance. Avoid relying on soil compaction alone in clay or sandy conditions, the concrete footing does the real stabilization work.
Q: Can you fix a leaning wood fence without replacing the concrete?
A: Yes, in many cases. If the existing concrete footing is still attached to the post and hasn't cracked apart, you can use a fence post repair kit with a steel ground spike or post anchor driven adjacent to the footing. The old footing stays in place while the new hardware provides the structural support. Expanding foam injected around the post base is another option that avoids full excavation. Neither method works if the post itself is rotted, that requires full replacement regardless of the footing condition.
This article was written using GrandRanker
Frequently Asked Questions
Q: How do you fix a leaning fence post without removing it?
A: If the post still has structural integrity and the wood shows no rot, you can straighten it without full removal. Dig out soil on the high side of the lean to relieve pressure, use a clamp and temporary brace to pull the post plumb, then pack the hole with compacted gravel and fast-setting concrete. Expanding foam products designed for fence posts are another option. This approach works best when the original footing is intact and the post is pressure-treated lumber in good condition.
Q: When should you replace a fence post versus repairing it?
A: Replace the post when the wood is soft, spongy, or shows visible rot at or below the soil line — probing with a screwdriver will reveal decay quickly. A post that has lost more than one-third of its cross-section to rot lacks the load-bearing capacity to hold rails and pickets securely. If the concrete footing has heaved, cracked, or pulled free entirely, replacement is also more cost-effective than patching. Repairing makes sense only when the post is structurally sound and the lean comes from soil movement alone.
Q: How do you reinforce a loose fence post in soft soil?
A: Soft or sandy soil compacts poorly and allows posts to shift over time. Dig the hole at least deeper than the frost line for your area, add a gravel drainage layer at the base, and set the post in fast-setting concrete rather than backfilled soil. For ongoing stability, a post anchor driven into undisturbed subsoil alongside the existing footing adds a second point of resistance. Avoid relying on soil compaction alone in clay or sandy conditions — the concrete footing does the real stabilization work.
Q: Can you fix a leaning wood fence without replacing the concrete?
A: Yes, in many cases. If the existing concrete footing is still attached to the post and hasn't cracked apart, you can use a fence post repair kit with a steel ground spike or post anchor driven adjacent to the footing. The old footing stays in place while the new hardware provides the structural support. Expanding foam injected around the post base is another option that avoids full excavation. Neither method works if the post itself is rotted — that requires full replacement regardless of the footing condition.