 ultimate-guide
How to Prepare House for Painting: Step-by-Step
Table of Contents
- What You'll Need Before Starting
- How to Power Wash House Before Painting
- Scraping Loose and Peeling Paint
- Repairing Wood Siding Before Painting
- Protecting Landscaping and Fixtures
- How Long Does Exterior House Prep Take
- Common Prep Mistakes to Avoid
- Frequently Asked Questions
Last Updated: September 19, 2026
What You'll Need Before Starting
Before you prepare house for painting, gather the right tools and materials. Working with the wrong equipment means slower progress, incomplete surface preparation, and a paint job that fails within a few years.
Start with safety gear: safety goggles, a respirator rated for dust and mildew, work gloves, and sturdy footwear with good grip. Pressure washing and scraping create debris that travels farther than you expect.
For cleaning and prep work, you'll need a pressure washer (2,500-3,000 PSI is standard for most residential siding), a degreaser, a stiff-bristled wire brush, and a paint scraper or putty knife.
Stock up on patching materials: exterior surface repair compound for small cracks, wood filler for damaged areas, and exterior-grade caulking with a caulk gun for joints and gaps. Don't skimp on quality here, cheap caulk shrinks and fails.
You'll also need drop cloths to protect landscaping and fixtures, masking tape for edges, and primer for any bare wood or exposed substrate you expose during prep. Skipping primer on bare wood causes paint to peel within 18 months.
Most exterior prep requires 48-72 hours of dry weather before primer and paint application.
How to Power Wash House Before Painting
Power washing removes mildew, dirt, and loose surface debris before you prepare house for painting. Pressure settings and technique vary significantly by siding material, using the wrong approach damages the substrate and creates costly repairs.
Wood Siding
Set your pressure washer to 2,500-3,000 PSI for solid wood. Higher pressures splinter wood fibers, open grain, and force water into gaps where it causes rot and swelling. Work from top to bottom in overlapping strokes, keeping the nozzle at a 45-degree angle to the surface. Maintain consistent distance; moving the nozzle closer than 12 inches concentrates pressure and gouges the wood.
Start with plain water to assess the surface. If mildew is heavy, apply a mildewcide solution, let it sit 10-15 minutes, then rinse thoroughly. Never apply pressure directly to mildew; spores scatter and mildew returns faster.
Vinyl Siding
Reduce pressure to 1,500-2,000 PSI for vinyl. Vinyl is more fragile than wood, and high pressure creates dents, cracks, and permanent deformation that trap moisture and compromise the siding's weather seal. Keep the nozzle moving steadily and maintain at least 18 inches of distance. Vinyl expands and contracts with temperature, so avoid sudden pressure changes that can force water behind panels.
Stucco
Stucco is porous and friable; use 1,500 PSI maximum, and consider 1,200 PSI for older or deteriorating stucco. High pressure forces water deep into the substrate, where it causes efflorescence (white mineral deposits), structural weakening, and hidden moisture damage. Use a wider spray pattern and longer strokes to distribute pressure evenly. If stucco shows existing cracks or spalling, hand-wash those areas with a soft brush and mild detergent instead of pressure washing.
Brick and Masonry
Brick is durable but mortar joints are vulnerable. Use 2,000-2,500 PSI and avoid directing the nozzle directly at mortar lines. High pressure erodes mortar and creates pathways for water infiltration. Angle the nozzle slightly downward to shed water away from joints. For historic brick or soft brick (common in older homes), reduce pressure to 1,500 PSI or less.
Fiber Cement Board
Fiber cement is engineered to resist moisture but still requires care. Use 2,000-2,500 PSI and maintain consistent distance. Avoid concentrating pressure on edges or seams where water can penetrate the substrate.
Universal Pressure Washing Steps
Pay special attention to areas where water pools: roof edges, gutters, foundation lines, and window sills. Work systematically to avoid missing sections.
After pressure washing, let the surface dry completely, 48-72 hours in dry conditions with relative humidity below 85%. Painting over damp substrate causes adhesion failure and premature peeling. Use a moisture meter to verify wood is below 15% moisture content before proceeding to scraping or priming.
Scraping Loose and Peeling Paint
Loose paint must come off completely. New paint won't adhere to peeling substrate.
Use a paint scraper or putty knife to identify loose areas. Press the blade flat against the surface and scrape at a shallow angle. Work systematically across the entire surface; incomplete scraping is where most DIY prep fails.
For heavy peeling, a wire brush attachment on a drill speeds the process. Use medium speed; high speed generates heat that damages substrate. Always wear a respirator; paint dust may contain lead or hazardous materials.
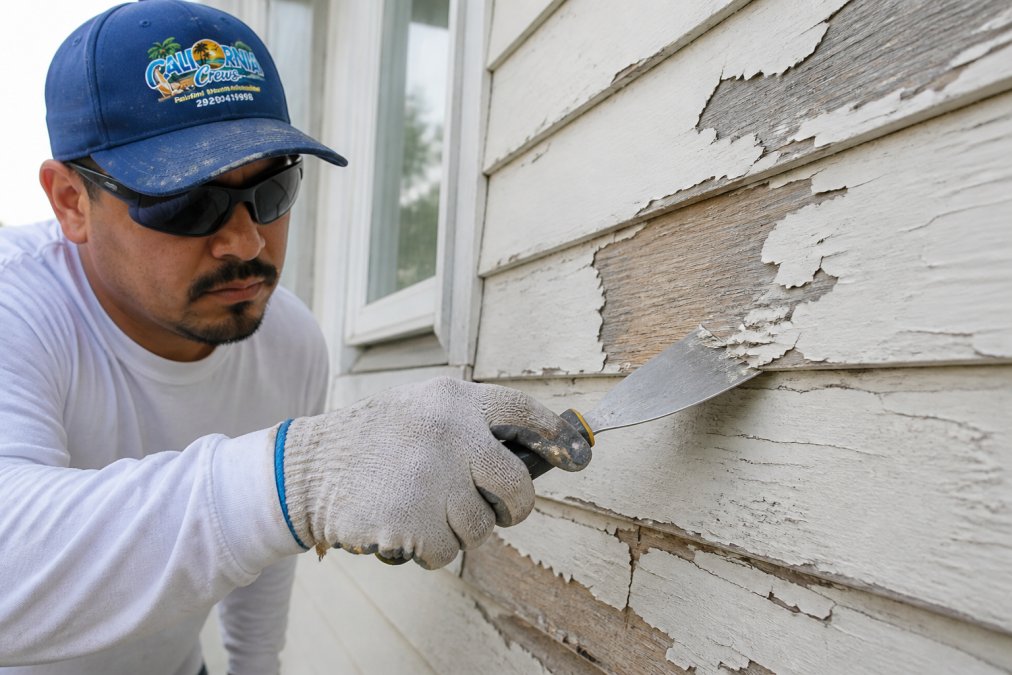
After scraping, sand rough edges where old paint meets bare substrate using 80-120 grit sandpaper. Every area you skip becomes a failure point for the new paint.
Repairing Wood Siding Before Painting
Wood rot and damaged boards need repair before painting. Paint only seals moisture inside, accelerating decay.
Check for soft spots by pressing a screwdriver tip into the wood. If it penetrates more than 1/4 inch with light pressure, the wood is compromised. Small soft areas can be treated with wood filler. Larger damage requires board replacement.
For minor damage, use exterior-grade wood filler. Clean out loose wood with a chisel, dampen the area, and apply filler with a putty knife. Overfill slightly as it shrinks when drying. Sand flush once dry.
For cracks in solid wood, use exterior caulking instead of filler. Caulk remains flexible as the wood expands and contracts with temperature and moisture changes. Filler hardens and cracks when the substrate moves.
Moisture content matters. If wood is above 15% moisture, primer and paint won't adhere properly. Use a moisture meter to check before you proceed. If moisture is high, allow additional drying time or the paint job will fail.
Wood rot returns within months when homeowners use interior-grade products on exterior surfaces. Exterior wood products are formulated to expand and contract without cracking.
Protecting Landscaping and Fixtures
Overspray and drips damage plants, stain hardscape, and create cleanup headaches. Protect everything before you start.
Use drop cloths to cover plants, mulch, and flower beds. Canvas drop cloths stay in place better than plastic.
How Long Does Exterior House Prep Take
Total prep time for how to prepare house for painting depends on house size, condition, weather, and environmental factors. A typical 2,000-square-foot house takes 3-5 days of active work, but environmental conditions can extend this to 7-10 days.
Active Work Breakdown
- Pressure washing: 4-8 hours (1 day)
- Scraping and sanding: 6-10 hours (1-2 days)
- Repairs and caulking: 4-6 hours (1 day)
- Masking and protection: 2-3 hours (partial day)
- Total active work: 16-27 hours over 3-5 calendar days
Drying Time Requirements
- Ideal conditions (50-75°F, 40-60% RH, no rain): 48-72 hours
- High humidity (70-85% RH): 72-96 hours
- Very high humidity or recent rain: 96-120 hours
- Cool temperatures (below 60°F): Add 24 hours minimum
- Shaded or north-facing walls: Add 24-48 hours
Environmental Variables That Extend Timelines
Dew Point and Morning Moisture
Humidity Swings
Seasonal Timing
- Spring (March-May): Unpredictable. Rain is frequent, humidity is high, and temperatures fluctuate. Expect 7-10 days for full prep including drying delays.
- Summer (June-August): Fastest timeline. Low humidity, warm temperatures, and long daylight hours accelerate drying. Plan 3-5 days.
- Fall (September-November): Similar to spring. Cooling temperatures slow drying, and rain is common. Plan 7-10 days.
- Winter (December-February): Slowest timeline. Cold temperatures dramatically slow drying, and freezing overnight can reset progress. Avoid exterior painting prep in winter unless temperatures consistently stay above 50°F.
Weather Delays
Material-Specific Drying Times
- Wood: Dries fastest in ideal conditions (48-72 hours). Slow in cool or humid weather (96-120 hours).
- Vinyl: Dries quickly because water beads and runs off (24-48 hours). Less affected by humidity.
- Stucco: Dries slowly because it's porous and absorbs moisture (72-96 hours minimum). High humidity extends this significantly.
- Brick and masonry: Very slow drying due to porosity (96-120 hours). Mortar joints retain moisture longest.
Professional vs. DIY Timeline
Timeline Planning Checklist
| Condition | Timeline Impact |
|---|---|
| Ideal weather (60-75°F, 40-60% RH, no rain forecast) | 3-5 days total |
| High humidity (70-85% RH) | Add 24-48 hours |
| Cool temperatures (below 60°F) | Add 24-48 hours |
| Recent rain or damp surfaces | Add 48-72 hours |
| Extensive repairs needed | Add 2-3 days |
| Shaded or north-facing walls | Add 24-48 hours |
| Spring or fall season | Plan 7-10 days |
| Summer season | Plan 3-5 days |
Common Prep Mistakes to Avoid
Most paint failures trace back to prep shortcuts. Here's what to watch for.
Frequently Asked Questions
Do I need to wash the outside of the house before painting?
Yes. Pressure washing removes mildew, dirt, and debris that prevent proper adhesion. Use a degreaser on heavily soiled areas, then rinse thoroughly. Allow 24-48 hours drying time before proceeding with scraping or priming. Skipping this step leads to paint failure and premature peeling.
What is the best way to remove loose paint before repainting?
Use a paint scraper or wire brush to remove all peeling paint down to solid substrate. Scrape aggressively until you reach paint that won't lift. Sand rough edges smooth. Wear a respirator if scraping creates dust. Once bare wood is exposed, apply primer immediately to prevent moisture absorption and wood rot.
Should I repair wood rot before painting my home?
Absolutely. Wood rot compromises structural integrity and spreads if left untreated. Remove rotted sections with a chisel, treat the area with a wood preservative, and fill with exterior-grade wood filler. Allow the filler to cure fully, sand smooth, and prime before painting. Ignoring rot leads to costly repairs later.
How long does exterior house prep take compared to actual painting?
Proper preparation typically takes 3-7 days depending on house size, existing paint condition, and weather. Painting itself may take 2-4 days. Many contractors spend 60-70% of project time on prep work because surface integrity directly affects paint longevity. Rushing prep guarantees poor results and shorter paint life.