 ultimate-guide
How to Prepare Your Home for Interior Painting
Table of Contents
- What You'll Need Before Interior Painting Prep Begins
- Clear the Room: Furniture, Wall Decor, and Hardware
- How to Clean Walls and Complete Surface Preparation
- How to Repair Drywall Cracks Before Painting
- Best Tools for Interior Painting Prep
- Pet, Child, and Eco-Safety During Prep
- How Long Does Interior Painting Prep Take?
- Post-Prep Checklist and Contractor Coordination
Last Updated: August 24, 2026
Proper interior painting prep is the difference between a paint job that looks flawless for years and one that starts peeling, cracking, or bubbling within months. Most homeowners underestimate how much work happens before a single brush stroke. This guide covers every stage of how to prepare your home for interior painting, from clearing furniture to coordinating with your contractor, so your walls come out right the first time.
What You'll Need Before Interior Painting Prep Begins
Interior painting prep starts with gathering the right materials. Here's what you'll need on hand:
- Painter's tape (1.5-inch and 2-inch widths)
- Drop cloths (canvas preferred over plastic)
- Spackle or wall putty
- Sanding block (120-grit and 220-grit)
- Tack cloth
- Sugar soap or TSP substitute degreaser
- Caulk and caulking gun
- Putty knife
- Primer
- Screwdriver (for switch plates and outlet covers)
- Moisture meter (if testing exterior-adjacent walls)
Before you start, take photos of every wall and surface imperfection. If you're working with a contractor, these photos protect both parties if disputes arise later about pre-existing damage.
| Prep Task | Tools Needed | When to Do It |
|---|---|---|
| Remove wall hangings | Screwdriver, patching putty | Day before painting |
| Remove switch plates | Flathead screwdriver | Day of painting |
| Clean walls | Sugar soap, sponge | 24-48 hours before |
| Moisture test walls | Moisture meter | 48 hours before |
| Patch and sand | Spackle, sanding block, tack cloth | 24-48 hours before |
| Tape edges and trim | Painter's tape | Morning of painting |
| Lay drop cloths | Canvas drop cloths | Morning of painting |
Clear the Room: Furniture, Wall Decor, and Hardware
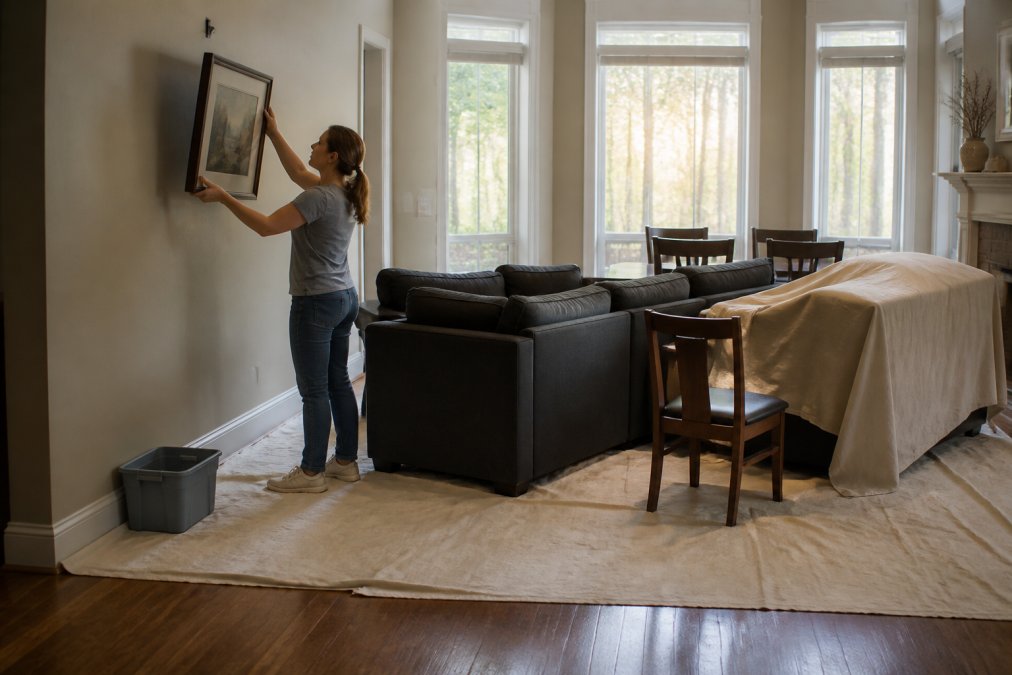
The biggest mistake with room prep is treating it as a quick job. Furniture that's only partially moved, wall decor left hanging, and outlet covers still in place all slow down painting and compromise the finish. Large sofas, bookshelves, and beds should come out of the room entirely if space allows.
Removing Wall Hangings, Switch Plates, and Outlet Covers
Wall hangings, picture frames, and knick-knacks should all come down. Leaving anything on the walls forces the painter to cut around it, creating visible inconsistencies in coverage.
Remove every switch plate and outlet cover using a flathead screwdriver and store the screws in a labeled bag. Painting around them produces a sloppy edge that's immediately visible once the covers go back on. For wall hangings that used adhesive strips, check the wall surface underneath and clean off any residue before patching, as it can prevent primer and paint from bonding correctly.
Protecting Floors, Fixtures, and Trim with Drop Cloths and Painter's Tape
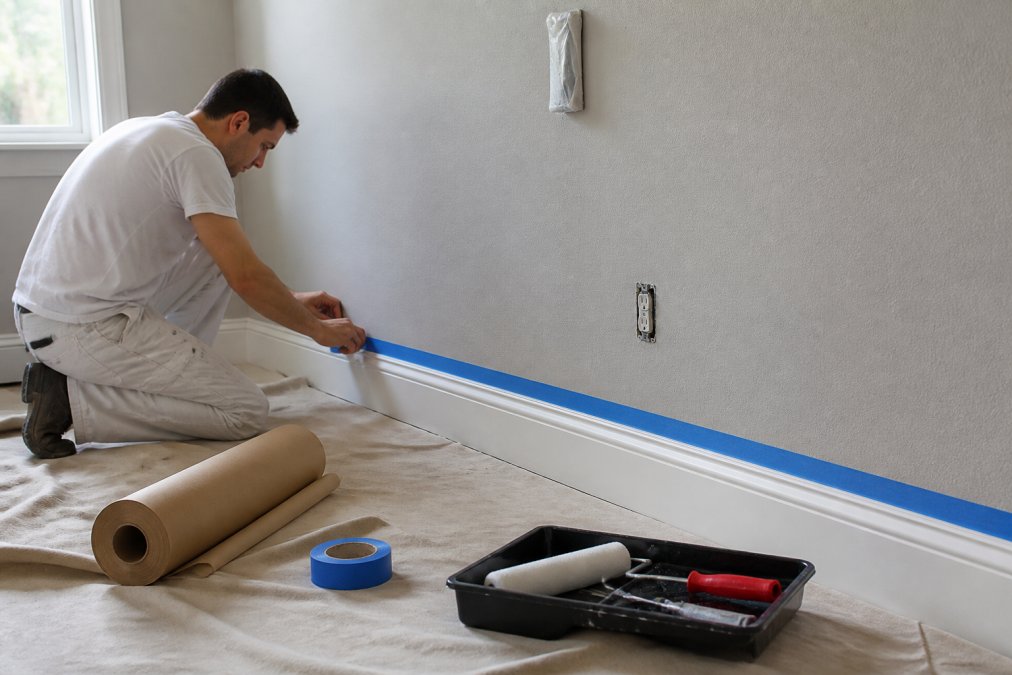
Canvas drop cloths are the professional choice for floor protection. They stay in place, absorb drips, and won't slip underfoot. Lay them edge to edge so there are no gaps near baseboards.
Painter's tape goes on all trim, baseboards, door frames, and window casings. Press the tape edge firmly with a putty knife to seal it. A loose tape edge is the most common cause of paint bleeding onto trim.
How to Clean Walls and Complete Surface Preparation
Clean walls are non-negotiable for good adhesion. Paint applied over a dusty, greasy, or contaminated surface will fail prematurely.
Degreasing and Dust Removal
Sugar soap is the standard choice for wall cleaning. Mix it according to package instructions, apply with a sponge, and work from top to bottom. Pay extra attention to kitchen walls, areas around light switches, and doorways, which accumulate grease and oils from regular contact.
For dust removal on walls that haven't been washed recently, use a dry microfiber cloth or vacuum with a brush attachment first. The sequence matters: dry dust removal first, then wet degreasing.
According to the EPA's guidance on interior surface preparation for painting, surfaces in older homes may contain lead-based paint. If your home was built before 1978, test walls before sanding or scraping.
Pre-Painting Moisture Testing
Pre-painting moisture testing is one of the most overlooked steps in interior painting prep. Paint applied over a wall with elevated moisture content will blister, peel, and fail within months.
Use a pin-type or pinless moisture meter on any wall that shares a boundary with an exterior surface, sits below grade, or has a history of water intrusion. A reading above 15% indicates the surface needs to dry further or the underlying moisture source needs to be addressed before painting.
Pay particular attention to walls adjacent to bathrooms or kitchens, basement walls, exterior-facing walls in areas with known weather exposure, and any wall that previously showed water staining.
How to Repair Drywall Cracks Before Painting
Repairing drywall cracks before painting is essential for a smooth, professional finish. Skipping this step means every imperfection shows through the final coat.
Patching, Caulking, and Sanding for Surface Integrity
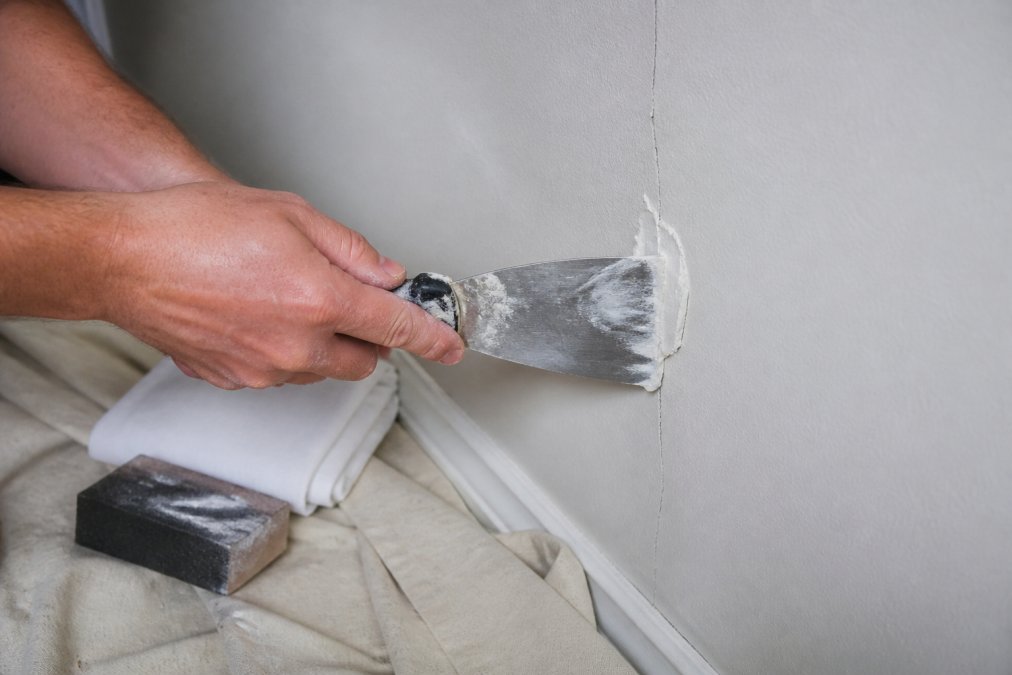
Spackle is the go-to material for small holes, nail pops, and hairline cracks. Apply it with a putty knife, slightly overfilling the repair, and let it dry completely before sanding. Most lightweight spackle dries in one to two hours.
For larger cracks, especially those running along corners or where walls meet ceilings, caulk provides a more flexible repair that won't re-crack as the house settles. Use paintable latex caulk, apply a thin bead, and smooth it with a damp finger or caulk tool.
Sanding is where surface integrity comes together. Use a 120-grit sanding block to knock down patched areas, then finish with 220-grit for a smooth transition. After sanding, wipe the entire surface with a tack cloth to remove all dust. For the best adhesion, especially over repaired areas, apply a coat of primer before the finish paint.
Best Tools for Interior Painting Prep
Non-negotiable tools:
- Sanding block: More control than a sanding sponge for flat surfaces. Use 120-grit for initial sanding and 220-grit for finish sanding.
- Tack cloth: The only reliable way to remove fine sanding dust before priming.
- Canvas drop cloths: Heavier and safer than plastic sheeting.
- High-quality painter's tape: Cheap tape bleeds. Spend more here; it's worth it.
- Putty knife: A flexible 3-inch blade handles most spackle work.
Worth having:
- Moisture meter: Inexpensive and potentially saves you from a failed paint job.
- Caulking gun: Necessary for any corner repairs or trim gaps.
- Pole sander: Speeds up sanding large wall sections significantly.
The EPA's Safer Choice program for household products offers guidance on selecting low-VOC cleaning products, which is relevant when choosing your sugar soap or degreaser, especially in homes with children or pets.
Pet, Child, and Eco-Safety During Prep
Prep work generates real hazards, and households with kids or pets need to account for them specifically.
Pets: Sanding dust, primer fumes, and paint odors are respiratory irritants for animals. Keep pets out of any room being prepped and ensure cross-ventilation is running before allowing them back in. Spackle and caulk compounds are also mildly toxic if ingested; keep tubes and containers sealed and out of reach.
Children: Sanding creates fine airborne particles that linger. If your home was built before 1978, treat any sanding as a potential lead exposure event. The CDC's guidance on lead exposure prevention in homes recommends wet sanding methods and HEPA vacuuming to minimize dust when working in older homes.
Eco-friendly disposal: Prep waste, including used tack cloths, empty spackle containers, and leftover caulk, should be disposed of properly. Dried latex paint and spackle can go in regular trash once fully hardened. Solvent-based products require hazardous waste disposal. Check your local municipal waste guidelines for specifics.
How Long Does Interior Painting Prep Take?
Interior painting prep for an average-sized room takes between four and eight hours, spread across one to two days.
Here's a realistic breakdown:
- Clearing and covering furniture: 30-60 minutes per room
- Removing hardware and wall decor: 20-30 minutes per room
- Wall cleaning and degreasing: 1-2 hours per room (including dry time)
- Moisture testing: 15-30 minutes
- Patching, caulking, and first sand: 1-2 hours depending on wall condition
- Drying time for spackle and caulk: 1-4 hours (cannot be rushed)
- Final sanding and tack cloth wipe: 30-45 minutes
- Taping edges and laying drop cloths: 30-60 minutes
Plan prep across two days for any room with significant repairs.
Post-Prep Checklist and Contractor Coordination
Before any paint goes on, run through this checklist:
- All furniture cleared or covered with drop sheets
- Wall hangings, knick-knacks, and decor removed
- Switch plates and outlet covers removed and stored
- Vent covers removed
- Floors covered with canvas drop cloths, edge to edge
- Trim, baseboards, and door frames taped with painter's tape
- Walls cleaned with sugar soap and fully dry
- Moisture test completed on all at-risk walls
- All holes, cracks, and nail pops patched with spackle or caulk
- Patched areas sanded smooth with 120-grit, finished with 220-grit
- All surfaces wiped down with tack cloth
- Primer applied to repaired areas
- Before photos taken of the entire room
Contractor coordination: If you're handing off to a professional crew, communicate which walls have been repaired and where, any areas with moisture concerns, whether the home has children or pets requiring specific ventilation protocols, and your expectations for cleanup. A professional crew should walk the room with you before starting. Good interior painting prep is a shared responsibility between the homeowner and the contractor.
Thorough interior painting prep is what separates a paint job that holds up for years from one that needs redoing within twelve months. If you're planning an interior renovation and want a crew that treats prep as seriously as the painting itself, California Crews / Painting & Fencing Modesto handles both interior and exterior painting with attention to surface preparation, material quality, and clean worksite practices. Get in touch with California Crews / Painting & Fencing Modesto for a quote and find out what professional prep actually looks like from start to finish.
Frequently Asked Questions
Q: Do I need to move all my furniture before interior painting?
A: Ideally, yes. Moving furniture completely out of the room gives painters full access to walls and baseboards and eliminates the risk of drips or scuffs. If a piece is too heavy to remove, push it to the center of the room and cover it with drop cloths. Protect any remaining items with plastic sheeting secured with painter's tape. Leaving furniture in place near walls is the most common cause of accidental paint damage during interior painting prep.
Q: Is it necessary to remove outlet covers before painting?
A: Yes. Removing switch plates and outlet covers takes about 30 seconds per plate and prevents paint buildup around edges, which looks unprofessional and can interfere with cover reinstallation. Store the screws in a small bag taped to the wall nearby so nothing gets lost. Paint the wall behind the plate, let it dry fully, then reinstall. Taping over covers instead of removing them is a shortcut that almost always shows in the finished result.
Q: How long does it take to prep a room for painting?
A: A standard bedroom takes 2 to 4 hours to prep properly: roughly 30 minutes to clear and protect the room, 30 to 60 minutes to clean walls with sugar soap, and 1 to 2 hours to patch holes, sand, and apply primer where needed. Larger rooms or walls with significant damage take longer. Skipping any of these steps shortens prep time but consistently leads to poor paint adhesion and a finish that won't last.
Q: How do I clean walls before painting?
A: Wash walls with a sugar soap solution using a sponge or cloth, working from the bottom up to avoid streaks. Rinse with clean water and let the surface dry completely before painting. Pay extra attention to areas near the kitchen, fireplace, or anywhere hands frequently touch, grease and residue on those spots will prevent paint from bonding. Once dry, wipe down with a tack cloth to pick up any remaining dust before applying primer or your first coat.
This article was written using GrandRanker
Frequently Asked Questions
Q: Do I need to move all my furniture before interior painting?
A: Ideally, yes. Moving furniture completely out of the room gives painters full access to walls and baseboards and eliminates the risk of drips or scuffs. If a piece is too heavy to remove, push it to the center of the room and cover it with drop cloths. Protect any remaining items with plastic sheeting secured with painter's tape. Leaving furniture in place near walls is the most common cause of accidental paint damage during interior painting prep.
Q: Is it necessary to remove outlet covers before painting?
A: Yes. Removing switch plates and outlet covers takes about 30 seconds per plate and prevents paint buildup around edges, which looks unprofessional and can interfere with cover reinstallation. Store the screws in a small bag taped to the wall nearby so nothing gets lost. Paint the wall behind the plate, let it dry fully, then reinstall. Taping over covers instead of removing them is a shortcut that almost always shows in the finished result.
Q: How long does it take to prep a room for painting?
A: A standard bedroom takes 2 to 4 hours to prep properly: roughly 30 minutes to clear and protect the room, 30 to 60 minutes to clean walls with sugar soap, and 1 to 2 hours to patch holes, sand, and apply primer where needed. Larger rooms or walls with significant damage take longer. Skipping any of these steps shortens prep time but consistently leads to poor paint adhesion and a finish that won't last.
Q: How do I clean walls before painting?
A: Wash walls with a sugar soap solution using a sponge or cloth, working from the bottom up to avoid streaks. Rinse with clean water and let the surface dry completely before painting. Pay extra attention to areas near the kitchen, fireplace, or anywhere hands frequently touch — grease and residue on those spots will prevent paint from bonding. Once dry, wipe down with a tack cloth to pick up any remaining dust before applying primer or your first coat.